Advanced Tips for Delverium
Sword harvesting, nested crafting loops, token runs, cosmetic slots, fertilizer timing, fast travel, and squeezing efficiency out of every NPC visit.
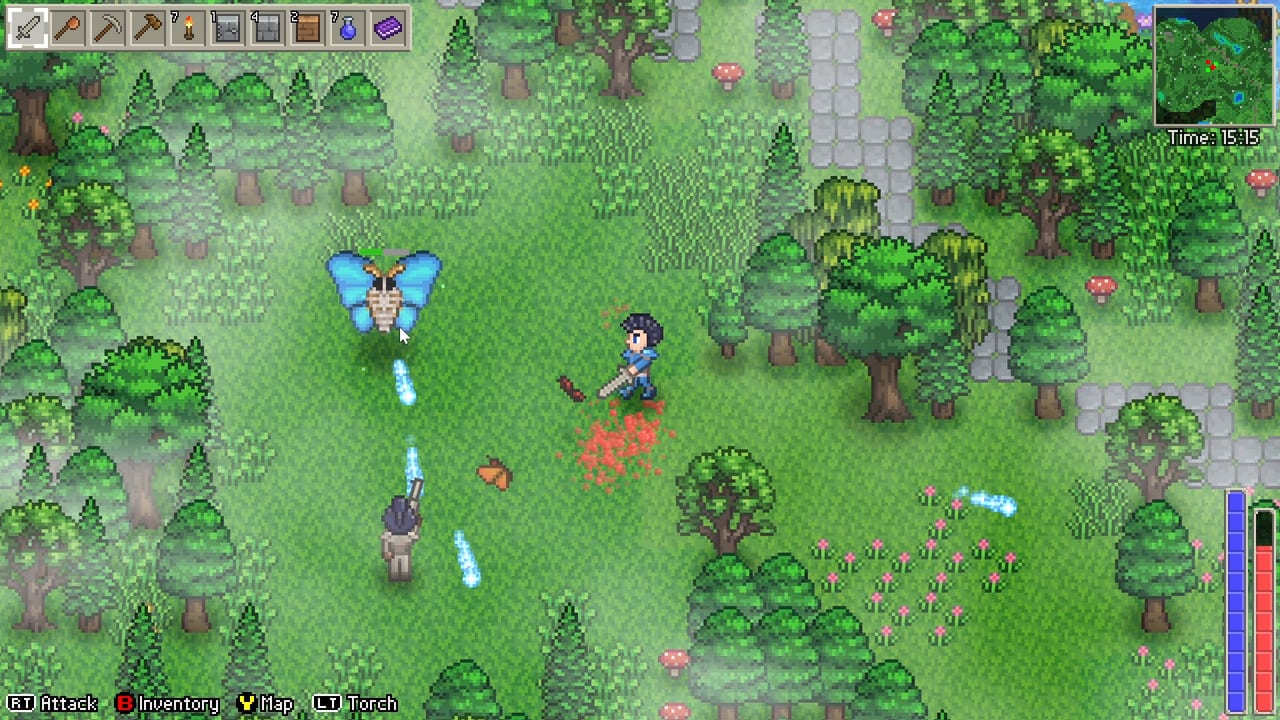
Delverium rewards players who experiment. The demo and preview sessions surfaced tricks, shortcuts, and optimisation patterns that are not obvious from the store page or the first-hour tutorial. Some of these are intentional design — the nested crafting system and Journey shrine fast travel — and some are community discoveries that Sagestone has not patched out. This page is the collection of things you figure out after fifty hours instead of five. Read it when you have a workbench, a furnace, and a farm that actually produces.\n\nSteam Early Access is scheduled for September 22, 2026. Tricks that work in the demo may change with Early Access balance patches. We note which tips are community-sourced versus confirmed from preview coverage.\n\n## Sword harvest — the multi-tile crop trick\n\nThe most discussed community trick is using a sword to harvest crops. In Delverium, a held sword does not behave like a hoe. When you swing a sword at a crop tile, the animation and damage radius can cover multiple adjacent tilled tiles at once. Rather than clicking each carrot individually, you can swing through a row of crops and harvest several tiles with a single action.\n\nRequirements for this to work:\n- Crops must be on adjacent tilled tiles (no gaps).\n- The sword must be equipped and in the active hand.\n- Crops must be fully grown; unripe crops do not drop on a sword swing.\n\nThis is a community-sourced observation from demo recordings. It may be a hitbox quirk that Sagestone fixes or keeps intentionally. Either way, it significantly reduces harvest time on a mature farm. Preview the trick on a small plot before you redesign your entire farm around it. If the behaviour changes in Early Access, we will note it on the updates page.\n\n## Nested crafting pipeline optimisation\n\nThe crafting guide covers the basics of nested crafting: if you are near the right station, intermediate ingredients resolve automatically. Advanced use of this system means designing your workshop around the crafting tree, not around aesthetics.\n\nA high-efficiency workshop layout from community-tested bases:\n\n1. Ore chest nearest the furnace — smelting is the most frequent nested step for tool and weapon upgrades. If the chest with ore is three corridors away, nested crafting will still work but you will waste real-world minutes walking back and forth.\n2. Bar output chest next to the anvil — the bars your furnace produces should flow into a chest at the anvil station. When you craft a sword that wants three bars, the anvil can pull from that chest without you pre-carrying.\n3. Ingredient colour coding — the demo menu shows ingredient availability by colour. Keep a mental model of which chest holds pre-smelted bars versus raw ore. Mixing them means the furnace tries to smelt an already-smelted bar and the craft line stays red.\n4. One craft at a time per station — in co-op, if the host is nesting a recipe and a guest opens the same furnace UI, the nested chain can break. Call the station. Craft one stack at a time. Put leftovers away before the next person walks up.\n\nNested crafting also applies to cooking. If your cook station is near your farm output chest, a recipe that wants tomatoes and fish can pull both from the same general area. Place the cook station on the farm side of your base, not in the bedroom corridor.\n\n## Token hunting strategy\n\nTokens are a collectible currency scattered across Delverium’s procedural map. Preview players reported finding them in treasure chests, dropped by certain enemies, and hidden in breakable environment objects. Community consensus on a token run strategy:\n\n- Explore during downtime, not dungeon time. Tokens are surface-level and world-chest rewards, not dungeon boss drops. A dungeon run is for ores and boss loot; a token run is for the map you have not seen yet.\n- Prioritise water and lava edges. Several token spawn points are reported near water edges and lava pools. Walk the perimeter of water tiles rather than cutting through the centre.\n- Carry a sword and a torch. Tokens in breakable objects require hitting them. A sword is faster than a pickaxe for environment objects and keeps you combat-ready for wandering enemies.\n- Check every chest before you open it. Some tokens are in ordinary-looking chests that also contain other loot. Do not skip the chest because the location looked empty.\n\nTokens are primarily for cosmetic and convenience unlocks. We will not publish a token map — the procedural generation makes it irrelevant. Use the links hub for official store links while you farm.\n\n## Cosmetic slot usage\n\nDelverium includes cosmetic slots for character personalisation. Preview players confirmed that cosmetics do not affect stats, crafting, or combat. They are purely visual. Practical notes on using cosmetic slots effectively:\n\n- Unlock slots progressively. Early Access may limit the number of cosmetic slots available on a fresh character. Craft or find cosmetic unlocks as you play rather than saving them for a hypothetical endgame wardrobe.\n- Mix rarity tiers. If cosmetics have rarity tiers in your build, mixing a rare hat with a common back item creates a more readable silhouette than stacking three legendary pieces that compete for the same visual space.\n- Cosmetics do not block tools. In the demo, cosmetic slots are separate from tool slots. Your hotbar is your combat loadout; cosmetic slots do not eat hotbar space. Use them freely.\n- Co-op visibility. In split-screen or online co-op, your cosmetic choices are visible to other players. This is not a reason to min-max cosmetics, but it is a reason to know what your character looks like before you walk into a screenshot moment.\n\n## Fertilizer strategies\n\nFertilizer appears in the farming system as a soil amendment that improves crop yield or growth speed. Preview players described two practical fertilizer strategies:\n\n- Pre-plant application — apply fertilizer to tilled soil before planting. This is the standard use case: till, apply, plant, water. The fertilizer activates on the next growth tick.\n- Mid-growth top-up — if a crop is already growing and you apply fertilizer mid-cycle, some crops may respond to the additional nutrients. Community testing is mixed on whether this is as effective as pre-plant application.\n\nFertilizer recipes in the demo required foraged or farmed ingredients plus processing at a station. Do not treat fertilizer as infinite. On a small four-to-eight tile plot, pre-plant application on your highest-value crop is the correct call. Fertilizing a twelve-tile monoculture of low-value crops wastes inputs you could have spent on the four tiles that actually matter.\n\nFertilizer is not a replacement for watering. Crops still need water every cycle. A fertilized dry field is still a dead field. See the farming guide for the watering baseline.\n\n## Inventory management tips\n\nDelverium’s expandable inventory is one of the quality-of-life pillars Sagestone is selling. Until you find or craft an upgrade, chests are cheap and they do not despawn. Advanced inventory discipline:\n\n- Categorise before you expand. Adding a bigger bag before you have a sorting system means a bigger pile of chaos. Three chest categories (tools and weapons, farm and food, building materials) beat one chest with everything in it.\n- Name or label where possible. If the UI allows labelling or if the chest sprite shows its contents visually, use that feature. A chest labelled “ore” and a chest labelled “bars” prevent a surprising number of late-night smelting mistakes.\n- Leave one slot open on the hotbar. A full hotbar means you pick up something and it hits the ground. Keep one open slot for unexpected drops from enemy kills and chest opens.\n- Drop junk before a dungeon run. A dungeon run is not the time to carry twelve wood, four straw, and a stack of low-value forage. Pre-sort before you walk into a cave. The furnace and crafting station are not going anywhere.\n- Overflow chest by the fast travel shrine. If you are token hunting or exploring far from base, place a small overflow chest near the Journey shrine you use most. Drop excess ore and forage there instead of making the full walk back.\n\n## Fast travel via Journey shrines\n\nJourney shrines are placed world objects that function as fast travel points once activated. The shrines guide covers the basics; this section covers advanced usage.\n\nActivating a shrine is a one-time action per session: walk up, interact, and the shrine lights up. Activated shrines appear on the world map if you have one, or remain visible as landmarks if you do not. Once activated, you can return to any previously activated shrine instantly.\n\nAdvanced shrine strategy:\n- Activate on the way out, not the way back. If you are heading to a dungeon and you pass a shrine, activate it then. You do not want to be running from a failed delve trying to find the shrine you skipped on the way in.\n- Build a base route of three to five shrines. Do not rely on one shrine near your base. Activate every shrine you find within reasonable walking distance. A route of five shrines means no single death point costs you the entire farm session.\n- Shrine placement and base defence. If you build a shrine into your outer wall, it becomes a fast-travel chokepoint and a known location for enemies. Consider placing the shrine slightly inside your perimeter rather than flush with the outer wall.\n- Co-op shrine sharing. In the demo’s co-op mode, activated shrines were shareable between online players on the same world. The host activates; guests inherit the route. Coordinate activation runs so one person is not activating the same shrine twice.\n\nJourney shrines do not replace a bed. A bed sets your respawn point. A shrine returns you to a previously visited location. Both are necessary; they are not interchangeable.\n\n## Maximising NPC efficiency\n\nNPCs in Delverium are recruited through the room system (see crafting) and serve as traders and role-specific vendors. Maximising their utility:\n\n- One NPC per room, one role per NPC. A blacksmith forges. An agronomist sells seeds. A merchant trades materials. A gatherer collects forage and sells gathered items. Stacking roles is not supported in the demo.\n- Place NPC rooms near your main throughput. The blacksmith’s room should be near your workshop, not across the base. The agronomist’s room should be next to the farm. An NPC who must walk across the entire base to be useful is an NPC you visit less often.\n- Light NPC rooms consistently. A dark NPC room may cause the NPC to despawn, relocate, or trigger a bat spawn inside your base. Keep torches lit. Replace them when they burn out.\n- Check stock daily during Early Access. NPC stock in the demo refreshed on a daily cycle. An agronomist who had seeds in the morning may have sold out by evening. Visit early, or visit twice.\n- NPC gift preferences. If your build has a gift or affection system for NPCs, the agronomist prefers farm products, the blacksmith prefers metal items, and the merchant has no stated preference in the demo. Respect preferences when you have surplus to offload.\n\nFor recruitment mechanics, room requirements, and NPC roles, see the crafting guide and the players hub. For co-op considerations when NPCs share a world with multiple players, see the co-op guide.\n\nFor the rest of the guide library, return to the guides hub. For the Early Access verdict, read the review before you design a token-hunting route.
Frequently Asked Questions
Quick answers to the most common Delverium questions.
Does the sword harvest trick work on all crops in Delverium?
Community testing from demo recordings shows it works on mature adjacent tilled crop tiles. Unripe crops do not drop on a sword swing. The trick may be a hitbox quirk that changes with balance patches. Preview it on a small plot before redesigning your farm.
How do I optimise my workshop layout for nested crafting?
Place the ore chest nearest the furnace, the bar output chest next to the anvil, and keep categories separate. Do not mix raw ore and pre-smelted bars in the same chest — the menu colour coding will conflict and your craft lines will stay red.
Where are tokens most commonly found?
Community reports suggest water edges, lava pools, and inside ordinary-looking treasure chests. Carry a sword for environment objects and check every chest before you open it. Tokens are surface-level and world-chest rewards, not dungeon boss drops.
Do cosmetic slots affect combat or stats?
No. Cosmetic slots in the demo are purely visual and do not affect stats, crafting speed, or combat performance. Use them freely without worrying about min-maxing your appearance.
Should I fertilize mid-growth or only before planting?
Pre-plant application is the standard approach. Mid-growth top-up is less reliably effective according to community testing. Prioritise pre-plant application on your highest-value crops and do not waste fertilizer on low-value monocultures.
Do Journey shrines replace a bed?
No. Journey shrines are fast travel points that return you to a previously visited location. A bed sets your respawn point on death. Both are necessary. An activated shrine near your base is not a substitute for a valid shelter with a bed.
How do I maximise NPC efficiency?
Place each NPC in their own valid room (walls, door, bed, light) near their primary function. Keep NPC rooms lit, check shop stock daily, and respect gift preferences if your build has that system. See the crafting guide for room rules and the players hub for NPC roles.